Underground Survival Shelters Concrete Bunkers: Ultimate Guide to Building Safety
As extreme weather events, long-term grid disruptions, and civil unrest concerns rise across the country in 2026, underground concrete survival shelters have become a top preparedness priority for families, preppers, and community groups. Unlike temporary above-ground shelters, properly constructed concrete bunkers offer unmatched protection from tornadoes, wildfires, nuclear fallout, and societal disruptions, with the ability to maintain a stable, habitable environment for weeks or even months at a time. This guide covers end-to-end, code-compliant advice for planning, building, and maintaining a safe underground concrete bunker, with actionable tips for both DIY builders and those hiring professional contractors.
Why Underground Concrete Bunkers Outperform Other Shelter Options
Concrete’s inherent strength and durability make it the gold standard for long-term survival shelters. A properly built reinforced concrete bunker resists projectiles, blast waves, extreme heat, and radiation, while its underground location naturally regulates temperature to a consistent 50–60°F in most regions, eliminating the need for active heating or cooling in all but the most extreme climates. For context on how below-grade bunkers compare to above-ground storm shelter tradeoffs, FEMA outlines distinct performance standards for each option based on regional threat profiles. Unlike wood or metal above-ground structures, concrete is non-combustible, making it ideal for wildfire-prone areas where ember attacks can destroy less robust shelters in minutes.
The main trade-offs of underground concrete bunkers are higher upfront costs and longer build times compared to prefabricated above-ground units, but their 50+ year lifespan and superior protection make them a cost-effective long-term investment for serious preppers. They also require more extensive pre-construction planning, including soil testing, permitting, and site preparation, to ensure safety and compliance.
Pre-Construction Planning: Site Selection, Legal Requirements, and Design Basics
Skipping pre-construction planning is the most common cause of failed or unsafe bunker builds. Taking the time to evaluate your site, comply with local rules, and finalize a functional design will save you money, avoid legal headaches, and ensure your shelter performs as intended during an emergency.
Site Selection Criteria
Your bunker’s location will make or break its safety and usability. Prioritize sites with well-draining sandy or loamy soil, and a high elevation above the local floodplain—never build in a FEMA-designated flood zone. Avoid areas with a high water table (within 5 feet of the surface), known fault lines, or steep slopes at risk of landslides. A licensed geotechnical engineer should test your site’s soil load-bearing capacity before finalizing your design, as unstable clay or loose gravel can exert enough pressure to crack un reinforced concrete walls over time. Also, site your bunker at least 100 feet from large trees to avoid root damage and falling debris during storms.
Key Site Selection Do's and Don'ts
- ✅ Do choose a site with well-draining soil (sand or loam) and a high elevation above the local floodplain
- ✅ Do test soil load-bearing capacity with a licensed geotechnical engineer before finalizing your design
- ❌ Don't build in areas with a high water table (within 5 feet of the surface) or known flood zones
- ❌ Don't site your bunker near large trees, steep slopes, or areas prone to landslides
For official flood map data and regional threat assessment guidelines, refer to the FEMA Safe Room Program, which provides free resources for evaluating site risk and meeting national shelter performance standards.
Legal and Zoning Compliance
As of 2026, all U.S. states require building permits for below-grade concrete structures, and many have additional zoning rules governing bunker depth, setback requirements from property lines, and limits on the percentage of your lot that can be covered by permanent structures. Some homeowner associations (HOAs) prohibit below-grade structures entirely, so confirm all rules before breaking ground. In some regions, bunkers built for emergency use may qualify for tax exemptions or FEMA safe room grants to offset construction costs.
Basic Design Requirements
Your bunker’s size will depend on the number of occupants and expected length of stay. For short-term occupancy (up to 72 hours), allocate a minimum of 72 cubic feet per person; for long-term stays (2+ weeks), plan for 150+ cubic feet per person. All designs must include at least two emergency exits located on opposite sides of the structure, a watertight entryway to prevent flooding, and dedicated intake and exhaust vents for air circulation.
Step-by-Step Concrete Bunker Construction Process
While professional contractors can complete a full bunker build in 4–6 weeks, DIY builders with construction experience can complete the project in 2–3 months with proper planning. Follow these steps to ensure structural integrity and safety.
Step 1: Excavation and Foundation Preparation
After securing all required permits, excavate the site to your planned depth, leaving a 1–2 foot overhang around the perimeter for waterproofing application. Compact the subgrade thoroughly before pouring a reinforced concrete foundation slab (minimum 4 inches thick, with a rebar grid spaced 12 inches apart) to prevent shifting and water infiltration. A common mistake DIY builders make is failing to compact the subgrade before pouring, which leads to settlement cracks within the first 2–3 years.
Step 2: Wall and Ceiling Construction
Use poured concrete (minimum 5,000 PSI) or precast concrete panels for walls, reinforced with rebar spaced no more than 16 inches apart in both directions. For regions with high seismic activity or blast risk, add steel plate reinforcement to wall exteriors for added impact resistance. The ceiling should be a minimum of 6 inches thick reinforced concrete, with a 1–2 foot layer of gravel backfill above to disperse weight and improve drainage. For concrete mix and reinforcement specifications that meet below-grade structural standards, consult the American Concrete Institute's official below-grade construction guidelines, which outline best practices for durability and load resistance.
Step 3: Waterproofing and Drainage Installation
Apply a continuous waterproofing membrane (rubberized asphalt or liquid-applied membrane) to all exterior concrete surfaces before backfilling. Install a perimeter French drain system around the bunker, connected to a sump pump with battery backup, to divert groundwater away from the structure. In high-humidity regions, add a vapor barrier to the interior walls to prevent condensation and mold growth, which can render a bunker uninhabitable in as little as 12 months if left unaddressed.
Step 4: Interior Finishing and Utility Installation
Line interior walls with rigid foam insulation (minimum 2 inches thick) to regulate temperature and reduce condensation. Install a ventilation system with both intake and exhaust filters (HEPA-grade for fallout or wildfire smoke protection) and a battery-operated backup fan to ensure air circulation during power outages. Add basic electrical wiring for lighting, powered by a solar panel system with battery storage to avoid reliance on the grid. For sanitation, install a composting toilet or a sealed holding tank with a waste removal plan for extended occupancy.
Critical Habitability and Safety Features
A bunker that is structurally sound is not automatically habitable. These features are non-negotiable for long-term safety and comfort.
Ventilation and Air Filtration
Proper ventilation is the top priority for preventing carbon dioxide buildup and maintaining air quality. A minimum of 4 air changes per hour is recommended for spaces with 4 or fewer occupants. For regions at risk of wildfires, nuclear fallout, or chemical events, install a Nuclear, Biological, and Chemical (NBC) filtration system, which can be integrated with standard HVAC units to remove harmful particulates from incoming air.
Emergency Access and Egress
As required by most building codes, install two separate exits: a primary entryway with a blast-resistant steel door, and a secondary emergency exit located at least 10 feet away from the primary entry, with a separate exterior access point. Mark both exits with reflective signage inside the bunker, and test them monthly to ensure they open freely even if debris blocks the primary entrance.
Radiation and Blast Protection
For full fallout protection, bunker walls should be a minimum of 2 feet thick reinforced concrete, with no windows. The entryway should include an airlock with two sealed doors to minimize radiation infiltration. For tornado or blast zones, add Kevlar or steel plating to exterior walls to increase impact resistance without significantly increasing build time.
Stockpiling Essentials for Long-Term Bunker Occupancy
Even the most well-built bunker is useless without adequate supplies. When building your stockpile, start by prioritizing core emergency supply categories, accounting for the number of occupants and expected length of stay. Non-perishable food should make up the bulk of your supplies, with a minimum 3-month reserve for a family of four. For water, allocate at least 1 gallon per person per day, and reference our guide to proper long-term water storage volumes to avoid contamination or shortage. Add a water purification system (beyond standard storage) for extended outages.
Medical supplies should include a comprehensive first aid kit, plus a 6-month supply of prescription medications for all occupants. For power, include solar panels, portable power stations, and plenty of rechargeable batteries. If you live in a hurricane-prone region, add hurricane-specific essential gear to your stockpile, including waterproof storage containers, portable radios, and a manual can opener. Pair your bunker supplies with a portable go-bag by following our guide to comprehensive survival kit building for rapid evacuation scenarios if you need to leave the bunker before it is safe to exit. When packing portable supplies for quick access, follow best practices for what to pack for a survival kit to avoid forgetting critical items.
Post-Construction Maintenance and Testing
A bunker requires regular maintenance to remain safe and functional. Test your sump pump and backup battery monthly, check ventilation filters every 3 months, and inspect concrete walls annually for cracks or water damage. Rotate stockpiled food and water every 6 months to prevent spoilage, and test emergency exits and backup power systems quarterly to ensure they function during an emergency. For full peace of mind, schedule a full structural inspection by a licensed engineer every 5 years to catch potential issues before they become safety hazards.
Supplementary Learning Resources
For builders looking to expand their skills beyond concrete bunker construction, these two practical guides offer actionable, beginner-friendly advice for shelter planning and wilderness survival:
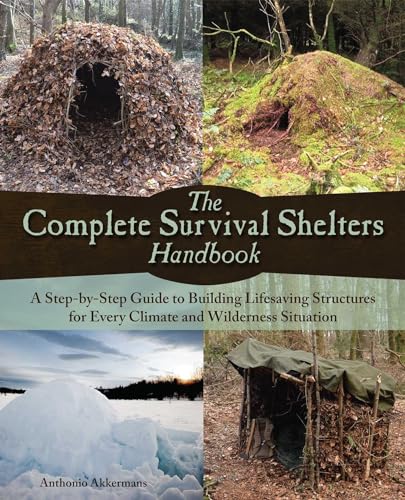
 A practical field guide covering wilderness shelter construction and below-grade building techniques for all climates
The Complete Survival Shelters Handbook is a useful supplementary resource for preppers who want to master shelter-building skills for off-grid or remote scenarios, with step-by-step guidance for building shelters using natural materials and minimal tools. It includes detailed illustrations suitable for beginners and experienced builders alike, with guidance for adapting designs to freezing, hot, and wet climates.
 A concise beginner-focused guide to planning, building, and stockpiling underground shelters for family safety
Underground Shelter For Survival is a compact, jargon-free guide tailored to first-time bunker builders, with clear steps for site selection, material selection, and stockpile planning. It is particularly useful for families new to preparedness, with actionable advice that avoids overwhelming technical construction details, and focuses on creating a shelter that can protect loved ones during societal disruptions.
Frequently Asked Questions
What is the minimum concrete thickness required for an underground survival shelter?
For protection from extreme weather and minor impact events, 8-inch thick reinforced concrete walls are the minimum standard. For regions at risk of tornadoes, blast events, or nuclear fallout, increase wall thickness to 18–24 inches, and add steel plate reinforcement to exterior surfaces for added impact resistance.
Do I need a building permit to construct an underground concrete bunker on my property?
In most regions, yes. As of 2026, all U.S. states require building permits for below-grade concrete structures, and many have additional zoning rules governing bunker placement, depth, and size. Check with your local building department before breaking ground, as unpermitted structures may be subject to fines or demolition orders.
How can I prevent moisture and mold growth inside my bunker?
Install a continuous rubberized asphalt waterproofing membrane on all exterior concrete surfaces before backfilling, add a perimeter French drain system with a battery-backup sump pump, and apply a vapor barrier to interior walls. Ensure your ventilation system runs regularly to circulate air and reduce humidity levels, even when the bunker is unoccupied.
How long can a family survive in a properly built concrete bunker?
With adequate stockpiles, a family of four can survive for 6–12 months in a 200-square-foot bunker, assuming access to water, power, and sanitation systems. For longer-term occupancy, add space for food production, such as hydroponic growing racks, and a larger water storage capacity.
Are underground concrete bunkers safe during earthquakes?
Yes, if built to local seismic code requirements. Use reinforced concrete with seismic rebar ties, and design the structure with flexible joints to absorb ground movement. Consult a licensed structural engineer to ensure your design meets regional seismic standards for your area.
Conclusion
Underground concrete survival shelters offer unmatched protection for families and communities facing extreme emergencies, from natural disasters to long-term grid disruptions. Building a safe, habitable bunker requires careful planning, compliance with local building codes, and attention to critical features like waterproofing, ventilation, and emergency egress. By following the steps outlined in this guide, you can create a reliable shelter that provides peace of mind for years to come.
If you are new to bunker construction, start by consulting with a licensed structural engineer and your local building department to confirm site feasibility and permit requirements. For supplementary skill-building, the guides listed above offer practical, beginner-friendly advice for shelter planning and wilderness construction. Prioritize your family's safety today by starting the planning process for your own underground shelter.