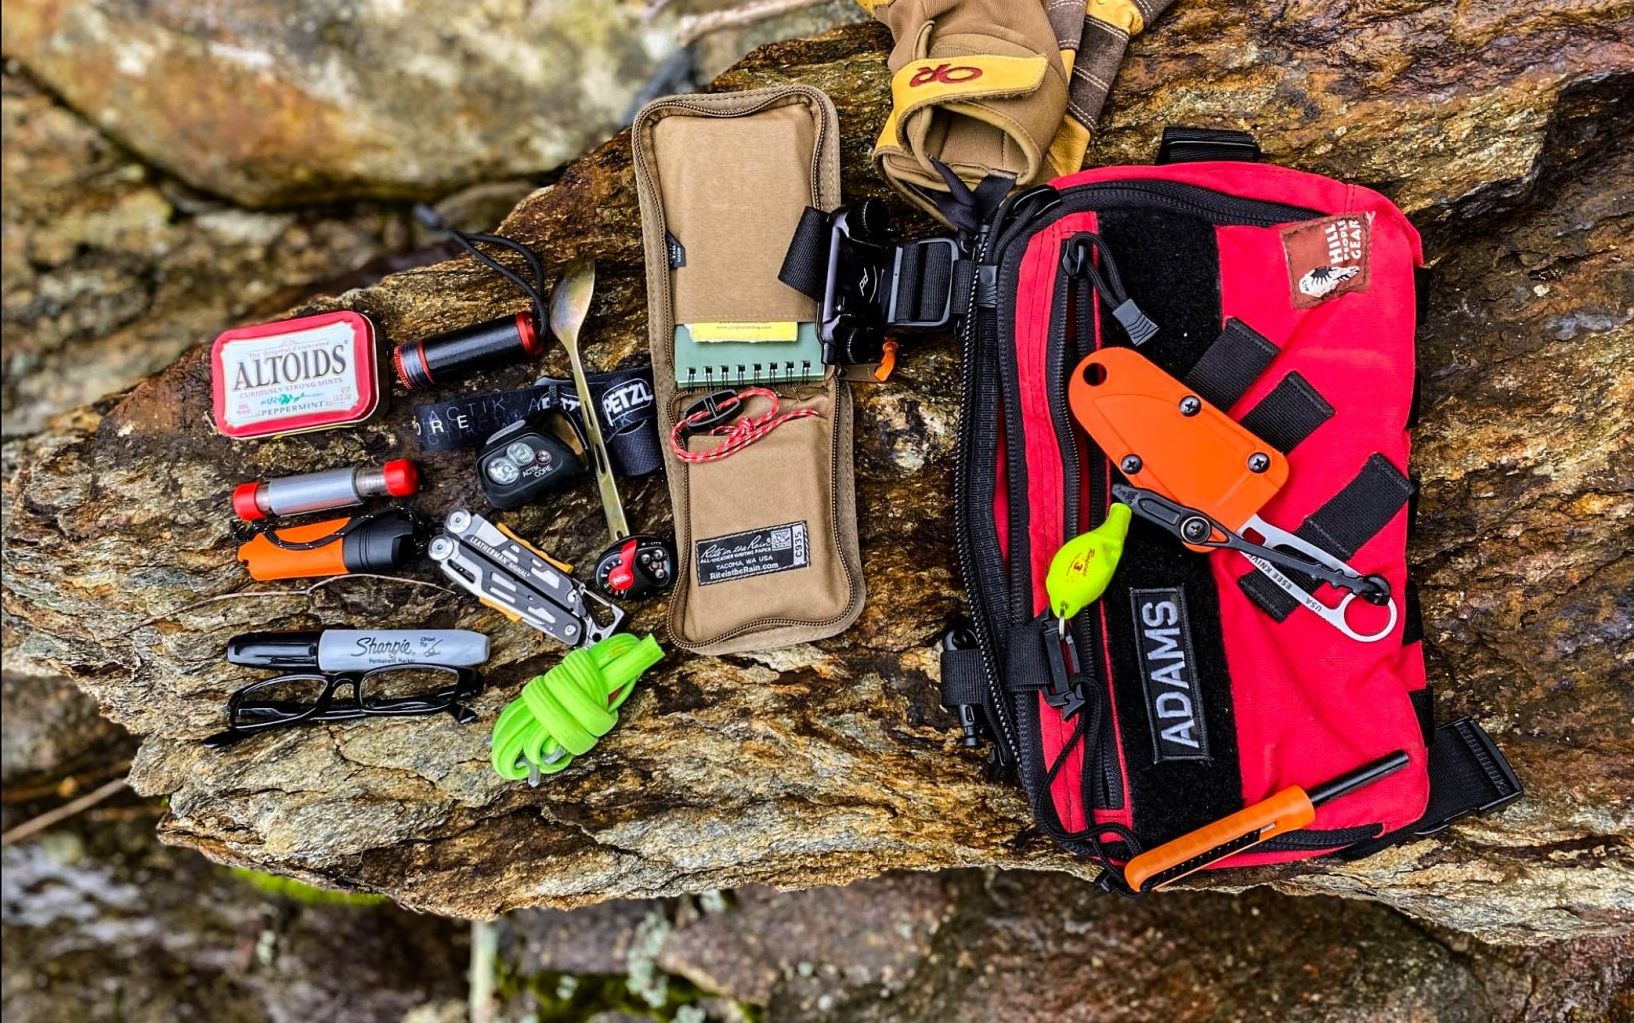
What is the Best Survival Gear: Ultimate Guide for Every Adventure
A sudden summer thunderstorm strands you on a remote backcountry trail with a dead phone and 3 miles to the nearest trailhead. A category 4 hurricane cuts power to your coastal neighborhood for 10 days. A minor car breakdown on a desert highway leaves you waiting 12 hours for roadside assistance. In all these scenarios, the right survival gear is the difference between a manageable inconvenience and a life-threatening emergency. But with thousands of products marketed as "essential" for outdoor adventures and disaster prep, it’s easy to overspend on gimmicks that fail when you need them most, or overlook low-cost, high-impact items that could save your life.
This 2026-updated guide cuts through the marketing noise to outline the best survival gear for every use case, based on real-world testing, guidance from leading outdoor safety organizations, and common mistakes new and experienced adventurers make when building their kits. We’ll cover core non-negotiable items, environment-specific picks, maintenance tips to keep your gear reliable, and how to prioritize what you actually need for your unique adventure, whether you’re a weekend day hiker, a multi-week backcountry trekker, or prepping for severe weather at home. You can also read our guide on bear grylls survival series ultimate knife.
Prioritize Your Kit With the 3-3-3 Survival Rule First
Before buying any gear, start with the globally recognized 3-3-3 survival framework, aligned with FEMA’s evidence-based emergency kit framework: you have 3 hours to find shelter from hypothermia or exposure, 3 days to access safe drinking water, and 3 weeks to secure food. This hierarchy eliminates guesswork, ensuring you address the most immediate life-threatening risks first before adding optional comfort items.
Many new preppers make the mistake of prioritizing luxury items like portable grills or high-tech gadgets before covering the basics that keep you alive in the first 24 hours of an emergency. For anyone prepping for coastal or severe weather events, cross-reference your supply list with hurricane-ready checklists to account for flood, wind, and power outage-specific risks. You can also read our guide on animal attack a wildlife survival guide.
The table below outlines the 10 core survival categories, minimum required items, and common pitfalls to avoid:
| Core Category | Minimum Required Item | Why It’s Non-Negotiable | Common Mistake to Avoid |
|---|---|---|---|
| Navigation | Physical topographic map, baseplate compass, PLB/satellite messenger | 90% of lost hikers are found within 24 hours if they have signaling tools; digital devices fail without power or signal | Relying solely on smartphone GPS, which dies in 6-8 hours of heavy use |
| Shelter | Lightweight tarp or emergency blanket, 50ft paracord | Hypothermia can set in at 50°F with wind and rain, even for experienced hikers | Choosing a shelter that’s too heavy for your trip length, leading to overexertion |
| Water | 2L personal storage, portable filter/purification tablets | Dehydration impairs cognitive function within 6 hours; untreated water causes giardia, E. coli infection | Assuming clear, fast-moving water is safe to drink without treatment |
| Food | 2,500+ calorie emergency rations per day, no-prep options | Low blood sugar impairs decision-making and increases risk of injury | Packing only sugary snacks that cause energy crashes mid-trip |
| First Aid | Basic medical supplies, personal medications, trauma kit (for high-risk trips) | 60% of backcountry rescues are for preventable injuries like blisters or sprains | Buying a pre-made kit and never familiarizing yourself with its contents |
| Fire | Ferrocerium rod + 2 sets of waterproof matches | Fire provides warmth, water purification, signaling, and morale | Packing only one fire starter that fails in wet or windy conditions |
| Tools | Full-tang fixed-blade knife, multi-tool with locking pliers | A cutting tool is used for 80% of critical survival tasks, from first aid to shelter building | Relying on a cheap, no-name multi-tool that bends under pressure |
| Lighting | Headlamp with extra batteries, backup mini flashlight | 70% of outdoor accidents happen after dark when visibility is low | Forgetting extra batteries, or using a flashlight that requires both hands to operate |
| Sun Protection | UPF-rated clothing, wide-brimmed hat, SPF 50+ sunscreen | Sunburn and heat exhaustion cause 15% of summer hiking rescues annually | Skipping sun protection on overcast days, when UV exposure is still high |
| Repair & Emergency | Duct tape, zip ties, emergency whistle, waterproof document case | Small gear failures (broken zippers, torn tarps) become life-threatening if unaddressed | Forgetting repair supplies, leading to unusable shelter or clothing in bad weather |
Core Non-Negotiable Survival Tools, Broken Down By Use Case
These core tools form the backbone of any survival kit, and are designed to help you complete critical tasks even with minimal training. Prioritize durability and multi-functionality over flashy features, and practice using every item before you rely on it in an emergency.
Cutting Tools: Knives & Multi-Tools
A reliable cutting tool is the most versatile item in your kit, used for everything from preparing food and cutting paracord to first aid and self-defense. For most use cases, a 4-6 inch full-tang fixed-blade knife made of 1095 high-carbon steel (easy to sharpen in the field with a small stone) or stainless steel (corrosion-resistant for wet, coastal environments) is more reliable than a folding knife, as it can withstand heavy use like batoning small firewood without breaking. For UK-based adventurers, sourcing a fixed-blade from reputable UK retailers for fixed-blade knives ensures you get a tool that meets local knife law requirements and durability standards for harsh coastal and mountain weather. You can also read our guide on the asshole survival guide kindle.
Multi-tools are a great space-saving backup for light-duty tasks: look for models with locking pliers, a can opener, and a serrated blade. Serrated edges are ideal for cutting thick paracord, dense canvas, or small hardwood branches without frequent field sharpening, making them a high-value feature for any multi-tool. A common mistake is relying on a cheap, no-name multi-tool that bends or breaks under stress — invest in a model from a reputable brand with a lifetime warranty for long-term reliability.
Fire Starters: Redundant Options For Every Condition
Fire provides warmth, cooks food, boils water, signals for help, and boosts morale in survival scenarios. The fire triangle (fuel, heat, oxygen) is the core principle of successful fire starting, and you should always carry 2-3 backup fire starters in case one fails. You can also read our guide on is metal gear survival still happening.
- Ferrocerium rods: The most reliable option for most use cases, they work when wet, produce sparks up to 5,000°F, and last for 10,000+ strikes with minimal maintenance. They function in sub-freezing temperatures with no fuel required.
- Waterproof matches: Burn for 10-15 seconds and are easy to use for beginners, but can be affected by high wind; store in a waterproof case to keep them dry.
- 2026 USB-rechargeable arc lighters: Convenient for urban or car survival kits, but depend on access to power to recharge; always keep a manual backup for off-grid trips.
A common mistake new adventurers make is packing only one fire starter, only to find it doesn’t work in high wind after getting caught in a sudden storm. Practice building fires in different weather conditions (wet, windy, cold) before your trip to build muscle memory, so you can start a fire quickly even if you’re injured or stressed. For tools built to withstand heavy fire prep use, look for long-lasting steel options for outdoor tools from reputable manufacturers.
Shelter: Lightweight Options For Every Environment
Shelter is your top priority in harsh weather, as hypothermia can set in within 3 hours of exposure to wind, rain, or cold temperatures, even in 50°F weather. The right shelter depends on your trip length and environment:
- Tarp (1-2 lbs): The most versatile option, can be rigged as a lean-to, groundsheet, or rain catch, and works for 1-4 people.
- Bivy sack (1-1.5 lbs): Ultralight, compact option for solo hikers, provides full protection from wind and rain with no setup required.
- Emergency blanket (2 oz): Reflects 90% of your body heat, and is a non-negotiable backup for every kit, even short summer hikes; it can also double as a groundsheet or signaling device.
- 4-season tent (5-10 lbs): Durable, wind-resistant option for cold, stormy, or snowy conditions, with a snow skirt to block drifting snow.
A common mistake is choosing a shelter that’s too heavy for your trip length, or not accounting for condensation in enclosed spaces. For 3-season use, a tarp + emergency blanket combo weighs less than 2 lbs and provides more than enough protection for most scenarios. For preppers building kits for hurricane season, review hurricane-specific shelter requirements to ensure your shelter can withstand high winds and heavy rain.
Water Purification: Safe Drinking Water For Any Source
Clean water is your second highest priority after shelter: dehydration sets in within 3 days, and untreated natural water can contain giardia, E. coli, and other pathogens that cause severe illness. Always follow EPA’s official water treatment guidelines to avoid ingesting bacteria, viruses, or protozoa that cause severe gastrointestinal illness, dehydration, and even death in remote areas. The four most common purification options are:
- Pump filters: Remove 99.9% of bacteria and protozoa, work for 1-4 people, but require manual pumping and can clog with sediment; ideal for group backcountry trips.
- Squeeze filters: Lightweight (2-4 oz), use water pressure to filter water, perfect for solo or small group trips; no moving parts, easy to clean in the field.
- UV purifiers: Kill 99.9% of viruses, bacteria, and protozoa, but require batteries and don’t remove sediment or chemicals; great for areas with known viral contamination.
- Purification tablets: Iodine or chlorine dioxide tablets are ultralight (1 oz) and work as a backup, but require a 30-minute wait time and can leave an aftertaste; ideal for emergency kits as a last resort.
A common mistake is assuming clear, fast-moving mountain water is safe to drink — it can still be contaminated with animal waste upstream. Always treat all natural water before drinking it, even if it looks clean.
Climate-Appropriate Clothing & Footwear: Prevent Hypothermia And Injury
The right clothing and footwear prevent hypothermia, heat exhaustion, blisters, and injuries, and are just as important as any tool in your kit. Avoid cotton at all costs: it holds moisture, loses all insulating power when wet, and can cause rapid heat loss in cold conditions.
Layering Systems For All Conditions
The three-layer clothing system is the most effective way to regulate your body temperature in changing conditions, and works for every climate:
- Base layer: Moisture-wicking merino or synthetic fabric that pulls sweat away from your skin to keep you dry; avoid cotton, which stays wet and chills you.
- Mid layer: Insulating fleece or down that traps body heat; down is lighter and warmer for cold, dry conditions, while synthetic insulation performs better when wet.
- Shell layer: Windproof and waterproof outer layer that blocks moisture and wind; look for breathable fabrics like Gore-Tex to avoid sweat buildup.
The key to effective layering is avoiding over-layering, which causes sweat buildup and moisture retention, leading to hypothermia when you stop moving. Use the “on/off” rule: add a layer before you start to feel cold, and remove it before you start sweating. A common mistake is wearing a cotton base layer on a cold, wet hike, which leads to rapid heat loss even if you have a waterproof shell.
Footwear Built For Your Terrain
Footwear protects your feet from sharp rocks, rough terrain, and moisture, and prevents blisters and sprains that can derail a trip in minutes. Choose options based on your use case:
- Mid-cut hiking boots: Provide ankle support for rough, uneven terrain, and are waterproof for wet conditions; break them in for at least 10 miles before a long trip to avoid blisters.
- Trail runners: Lightweight (1-1.5 lbs), flexible, and breathable, perfect for well-maintained trails and fast-paced hikes; ideal for warm, dry climates.
- Non-waterproof shoes: Breathe better than waterproof options in hot, dry climates, and dry faster if they get wet; avoid for wet or snowy conditions.
A common mistake is wearing new, unbroken-in boots on a long hike, which almost always leads to painful blisters that can make it impossible to walk. Always test footwear on short, easy hikes before relying on them for a long trip. If you’re hiking in areas with large wildlife, proper footwear also helps you avoid injury during an encounter; review wildlife encounter safety protocols to reduce your risk.
Sun & Extreme Weather Protection
For hot, sunny climates, choose lightweight, light-colored, UPF-rated clothing that blocks 98% of UV rays, and long sleeves/pants to prevent sunburn. Loose-fitting fabrics improve air circulation and reduce overheating. For cold climates, add a balaclava, insulated gloves, and warm socks made of merino wool to prevent frostbite on exposed skin. For wet climates, pack rain pants in addition to a rain jacket to stay fully dry. A common mistake is skipping sun protection on overcast days, when up to 80% of UV rays penetrate cloud cover.
Navigation & Signaling: Find Your Way Back And Get Found Fast
Even if you’re an experienced hiker, it’s easy to get lost in dense forest, heavy fog, or featureless desert terrain. Reliable navigation gear ensures you can find your way back to safety, and signaling tools help rescuers find you if you do get lost.
Navigation Tools That Don’t Depend On Power
A physical compass is the only navigation tool that doesn’t require batteries or signals, and works anywhere on Earth. Baseplate compasses are the best option for beginners, with clear orienting lines and a sighting notch for taking bearings. Handheld GPS devices offer precise location data, topographic maps, and route tracking, but require batteries or solar power to work. A common mistake is relying solely on a smartphone GPS, which can run out of battery or lose signal in remote areas. Always carry a physical compass and know how to use it, even if you have a digital GPS.
Always carry a physical topographic map of the area you’re exploring, even if you have offline digital maps downloaded to your phone. Before your trip, study your map to mark waypoints, water sources, emergency exit routes, and potential hazards. Share your full route plan with someone not on your trip, so they can alert rescue services if you don’t check in on time. A common mistake is not accounting for terrain difficulty: a 2-mile hike across a steep ridge can take 4 hours, not 2, so plan accordingly.
Signaling Tools That Rescuers Can See From Miles Away
If you’re lost or injured, signaling tools drastically reduce the time it takes for rescuers to find you. The universal distress signal is three blasts on a whistle, three flashes of a light, or three waves of a bright object — rescuers are trained to recognize this pattern. A signal mirror can be seen from 10+ miles away on a sunny day, and a whistle carries much farther than yelling, with far less energy expenditure. For remote trips with no cell service, a personal locator beacon (PLB) or satellite messenger can send your exact location to rescue services with the press of a button.
A common mistake is stashing signaling tools at the bottom of your pack, where you can’t access them quickly in an emergency. Keep your whistle, mirror, and PLB in an outer pocket or attached to your chest strap for instant access.
Food, Cooking & Hydration: Fuel For Adventure And Emergencies
Maintaining energy and hydration is critical for staying alert, making good decisions, and avoiding injury in survival scenarios. Plan for 2,500-4,000 calories per day for backcountry activities, depending on your weight, age, and the temperature (cold weather requires 10-20% more calories to maintain body heat).
Portable Cooking Gear For Hot Meals And Safe Water
Lightweight, compact cooking gear saves space and makes it easy to prepare hot meals and boil water:
- Canister stoves: Lightweight (2-4 oz), easy to use, perfect for 1-2 person trips, using isobutane fuel canisters; ideal for 3-season use above freezing.
- Liquid fuel stoves: Heavier, but work reliably in cold temperatures, making them ideal for winter or high-altitude trips.
- Titanium cookware: Lightweight, durable, and rust-resistant, a 1-2 person titanium cook set weighs less than 1 lb and lasts for decades.
Don’t forget a pot scraper and biodegradable soap: skipping these makes cleanup difficult and can attract wildlife to your campsite. Always pack out all food waste to avoid attracting animals. A common mistake is forgetting a windscreen for your stove, which reduces efficiency in open, windy conditions.
Nutrient-Dense, No-Prep Food Choices
Choose no-prep, long-shelf-life foods that provide balanced calories, protein, and fat:
- Freeze-dried meals: Lightweight, just add hot water, and provide 500-800 calories per serving, perfect for multi-day trips; test meals before your trip to avoid digestive issues from unfamiliar ingredients.
- Energy bars and jerky: No prep required, high in protein, and have a shelf life of 1-2 years; choose options with low added sugar to avoid energy crashes.
- Nuts, dried fruit, and nut butter: High in healthy fats and carbs, provide quick energy, and are lightweight; pack in small portions to avoid overeating.
A common mistake is packing only sugary snacks like candy and chips, which cause energy crashes and don’t provide sustained fuel for physical activity. Always test all food before your trip to make sure you enjoy it, and avoid unfamiliar meals that might cause digestive issues in the wild. For preppers building stockpiles, explore non-perishable food storage options that maximize shelf life and minimize waste.
Food Storage To Avoid Wildlife Encounters
Improper food storage attracts bears, raccoons, and other wildlife, putting both you and the animals at risk. In many national parks, bear-resistant canisters are required for all backcountry camping: they weigh 3-4 lbs and are completely animal-proof. In areas where canisters aren’t required, hang food bags 10+ feet high and 4 feet away from tree trunks, or use odor-proof bags to contain food smells. A common mistake is storing food in your tent, which almost always leads to wildlife encounters that can end in injury or property damage.
First Aid & Emergency Medical Supplies: Treat Injuries When Help Is Hours Away
Injuries and illness are the most common reason adventure trips are cut short, and professional medical help can be hours or days away in remote areas. Your first aid kit should be customized to your trip type, personal health needs, and skill level.
Basic Non-Negotiable Medical Supplies
Every kit should include the following non-negotiable items:
- Adhesive bandages in various sizes, sterile gauze pads, adhesive tape, and antiseptic wipes for cleaning and covering wounds.
- Tweezers for removing splinters, ticks, and debris, plus blunt-tip scissors for cutting clothing or bandages.
- Disposable gloves to protect yourself and injured people from infection.
- Pain relievers (ibuprofen, acetaminophen), antihistamines for allergic reactions, anti-diarrheal medicine, and oral rehydration salts to treat dehydration.
- A lightweight, waterproof emergency blanket as a non-negotiable hypothermia prevention staple, even for short summer hikes where temperatures drop 20+ degrees after nightfall.
Specialized Supplies For Your Use Case
Pack extra doses of any personal prescription medications in a waterproof container, enough to last 3-5 extra days in case your trip is extended. Add motion sickness medication for boat or rugged terrain trips, and hydrocolloid bandages or moleskin for blisters, the most common hiking injury. If you have severe allergies, pack an epinephrine auto-injector (EpiPen) and know how to use it. A common mistake is forgetting medications for pre-existing conditions, which can turn a minor issue into a life-threatening emergency in remote areas.
Trauma Kits For High-Risk Trips
For longer or higher-risk trips, add a trauma kit with a tourniquet (learn proper usage from a certified first aid course before relying on it), hemostatic gauze to stop severe bleeding, and a CPR mask for rescue breaths. Customize your kit for your environment: if you’re hiking in snake country, add a venom extractor, and if you’re traveling in areas with ticks, add a tick removal tool. If you’re in regions with large predatory wildlife, add a bear spray holster for quick access, and review wildlife encounter response steps to know how to react in an emergency. A common mistake is buying a pre-made kit and never opening it to familiarize yourself with the contents — in a high-stress emergency, you won’t have time to read instructions.
Backpacks & Carrying Systems: Carry Your Gear Comfortably For Miles
A reliable backpack holds all your gear, keeps your hands free, and distributes weight to reduce fatigue during long hikes. Choosing the right pack and packing it properly will make your trip far more comfortable and efficient.
Choosing The Right Pack For Your Trip Length
Pick a pack sized for your trip length: 20-30L for day hikes, 30-50L for 1-3 day trips, and 50-70L for multi-week expeditions. Look for packs made of high-denier ripstop nylon, with adjustable shoulder straps, a padded waist belt (which transfers 80% of the weight to your hips, reducing shoulder strain), compression straps to stabilize the load, and a hydration sleeve for a 2-3L water bladder. A common mistake is choosing a pack that’s too big, which leads to overpacking and unnecessary weight. For preppers building evacuation kits, choose a pack with easy-grab handles so you can grab it quickly if you need to leave your home in a hurry; review hurricane evacuation packing tips to prioritize critical items.
Packing & Weight Distribution For Efficiency
Use the “pack heavy, pack low” rule: place heavy items (water, food, stove) close to your spine and centered in the pack to keep your center of gravity balanced. Use packing cubes to organize clothing and soft items, and store frequently used gear (first aid kit, rain jacket, navigation tools) in outer pockets or the top of the pack for quick access. Use dry bags to keep critical items (sleeping bag, electronics, first aid) dry in rainy conditions. Proper weight distribution reduces fatigue by up to 30% and improves stability on rough terrain. A common mistake is packing heavy items on the top or outside of the pack, which makes you top-heavy and increases your risk of tripping or back strain on uneven terrain.

Proper weight distribution and organized packing reduce fatigue and ensure critical gear is accessible in seconds during an emergency.
Credit: trueprepper.com
Tech & Communication Gadgets: Balance High-Tech With Low-Tech Backups
Modern technology has made survival gear more reliable and accessible than ever, but it’s important to balance high-tech tools with low-tech backups that don’t depend on power or signals.
Power & Charging Solutions
Keeping your devices charged is critical for navigation, communication, and emergency signaling in off-grid areas. Look for portable power banks with at least 10,000 mAh capacity (enough for 1-2 full phone charges) and 20,000 mAh for multi-day trips. 2026 solar chargers (5-10W) offer 25% higher efficiency than older models, making them a great option for long backcountry trips. Keep your power bank in a waterproof case, and always test it before your trip to make sure it holds a charge. A common mistake is bringing a power bank but forgetting the charging cable, or not testing it until you need it in an emergency.
Off-Grid Communication Tools
Cell service is non-existent in 90% of remote wilderness areas, so a dedicated communication device is a non-negotiable for multi-day off-grid trips:
- Two-way radios: 1-5 mile range, perfect for group trips, no subscription required.
- Satellite messengers (e.g., Garmin inReach): Allow 2-way messaging, location sharing, and SOS calls, with a monthly subscription fee.
- Personal locator beacons (PLBs): Send a one-way SOS signal to global rescue services, no subscription required, but only work for emergency distress calls.
A common mistake is relying solely on your phone for communication, which has no service in remote areas. Always carry a dedicated communication device for off-grid trips. If you practice survival skills in open-world games like Red Dead Redemption 2, you can test virtual wildlife encounter protocols to build real-world confidence — review virtual survival scenario guides for low-stakes practice.
Environment-Specific Survival Gear: Tailor Your Kit To Your Adventure
The "best" survival gear varies drastically depending on the environment you’re exploring. Below are environment-specific picks to add to your core kit:
Jungle & Forest Gear
Dense foliage, high humidity, and insect-borne diseases are the biggest risks in jungle and forest environments. Prioritize:
- Permethrin-treated clothing to repel ticks, mosquitoes, and other disease-carrying insects; treat clothing before your trip, and reapply after 6-8 washes.
- A full-tang machete for clearing dense brush and cutting firewood; a 10-12 inch blade is ideal for most use cases.
- A water filter that removes 99.9% of protozoa like giardia, which is common in stagnant forest water.
- A lightweight rain poncho to stay dry in frequent afternoon thunderstorms.
A common mistake is wearing short sleeves and shorts, which exposes you to insect bites, poison ivy, and scratches from thick brush.
Desert Survival Equipment
Deserts are defined by extreme heat, scarce water, and rapid temperature drops at night (up to 40°F in some areas). Prioritize:
- A 3L hydration bladder instead of water bottles, so you can drink small amounts regularly while hiking (by the time you feel thirsty, you’re already 2% dehydrated, which impairs performance).
- A wide-brimmed hat, UPF-rated clothing, and SPF 50+ sunscreen to avoid sunburn and heatstroke; reapply sunscreen every 2 hours if you’re sweating heavily.
- A GPS with a water source layer, as natural water sources are rare and often not marked on standard maps.
- A cooling towel that stays cold for hours to lower your body temperature quickly.
A common mistake is hiking during the hottest part of the day (10am-4pm), which increases your risk of heatstroke; start early and rest during peak heat.
Cold Weather Essentials
Hypothermia and frostbite are the biggest risks in cold environments, even if temperatures are above freezing. Prioritize:
- A 4-season tent with a snow skirt to block wind and drifting snow.
- A sleeping bag rated 10-15 degrees lower than the expected low temperature, and a sleeping pad with an R-value of 4+ to insulate you from cold ground.
- Hand and foot warmers, plus a balaclava or face mask to prevent frostbite on exposed skin.
- A windproof lighter or ferro rod that works in sub-freezing temperatures, as standard lighters often fail in cold.
A common mistake is wearing cotton base layers in cold weather, which lose all insulating power when wet and cause rapid heat loss.
Urban & Disaster Preparedness Gear
For hurricane, blackout, or civil unrest scenarios, prioritize gear that works in built environments:
- A durable LED flashlight with extra batteries, and a portable power station to charge phones and small appliances during power outages.
- N95 masks to protect against smoke, dust, and airborne contaminants from wildfires or building damage.
- A pry bar or crowbar for moving debris in emergency situations.
- A 3-5 day supply of drinking water stored in durable containers, plus a portable water filter for treating tap water if the supply is contaminated.
A common mistake is forgetting to account for special needs (infant formula, pet food, prescription medications) in your urban disaster kit. Review hurricane-specific supply checklists to ensure you don’t miss critical items.
Gear Maintenance & Long-Term Care: Keep Your Gear Reliable For Years
Proper maintenance extends the life of your gear by years, and ensures it works reliably when you need it most. Inspect all gear every 6 months, and clean it after every use to prevent damage from dirt, moisture, and mold.
Cleaning & Storage Best Practices
- Knives: Wipe dry after every use, oil the blade with a light machine oil to prevent rust, and store in a sheath (not loose in your pack) to avoid damage to the blade and other gear.
- Water filters: Backflush with clean water after every use, and store dry to prevent mold and bacterial growth.
- Sleeping bags: Air out after every use to remove moisture, wash only when necessary with a technical cleaner, and store in a large cotton sack (not a compression sack) to preserve the insulation’s loft.
- Always store gear in a cool, dry place away from direct sunlight, which can degrade fabric and plastic components over time.
Field Repairs You Can Do In 5 Minutes Or Less
Keep a small field repair kit in your pack with duct tape (wrap it around a water bottle or trekking pole to save space), zip ties, a heavy-duty sewing kit, patches for tents and tarps, and replacement buckles. Fix small tears, loose seams, or broken zippers as soon as you notice them — a small hole in a tarp can become a large, unusable tear in high wind if left unrepaired. A common mistake is waiting to repair gear until you’re back from your trip, which can leave you without critical shelter or protection in bad weather.
Extending Your Gear’s Lifespan
Use gear only for its intended purpose: don’t use a 2-person tent for 3 people, as this strains the poles and fabric and leads to premature breakage. Rotate gear regularly to distribute wear, and avoid overloading backpacks or tools beyond their weight limits. Follow manufacturer care instructions for all items, and replace gear when it shows signs of significant wear: a frayed backpack strap or dull knife blade can fail at a critical moment, putting you at risk. High-quality gear built from durable materials can last 10+ years with proper care, while cheap, low-quality items may need replacing after 1-2 heavy uses.

A well-organized core kit covers the 10 essentials for backcountry trips, urban disasters, and everything in between.
Credit: www.youtube.com
Frequently Asked Questions
What essential items make up the best survival gear?
The best survival gear prioritizes the 10 core essentials outlined above: navigation tools, shelter, water, food, first aid, fire starters, cutting tools, lighting, sun protection, and repair supplies. The "best" items for you depend on your skill level, typical adventure type, and environment: a day hiker in the UK will need different gear than a multi-week backcountry trekker in the desert. Above all, the best gear is gear you know how to use under stress — a $200 knife you’ve never practiced with is far less useful than a $50 fixed-blade you’ve used to baton wood and prepare food dozens of times.
How do I choose durable survival gear that lasts?
Prioritize gear made from high-denier nylon (for bags/tarps), high-carbon or stainless steel (for blades/tools), and rust-resistant materials for any items exposed to moisture. Look for products with lifetime warranties from reputable outdoor brands, and read reviews from verified purchasers who have used the gear in conditions matching your intended use. Avoid ultra-cheap no-name products sold on generic marketplaces, as they often fail under stress: a $10 multi-tool will bend under heavy use, while a $50 name-brand model will last for decades with proper care.
Can compact survival gear be as effective as full-size options?
Absolutely, as long as it prioritizes multi-functionality and durability. Ultralight gear is designed for hikers and backpackers who need to minimize pack weight, and many compact items perform as well as full-size versions: a 1-pound tarp can serve as a shelter, groundsheet, and rain catch, while a 4-inch multi-tool replaces a full set of pliers, screwdrivers, and cutters. The key is avoiding single-use, ultra-light items that sacrifice durability: a flimsy $5 emergency blanket will tear after one use, while a $15 heavy-duty version will last for years.
Why is water purification a non-negotiable part of any survival kit?
Untreated natural water can contain harmful bacteria (E. coli, salmonella), viruses (hepatitis A), and protozoa (giardia, cryptosporidium) that cause severe vomiting, diarrhea, and dehydration. Even clear, fast-moving mountain water can be contaminated with animal waste upstream, and a single sip of untreated water can leave you bedridden for days in a survival scenario. For short trips, purification tablets are a lightweight backup, but for longer adventures, a portable filter that removes 99.9% of waterborne pathogens is the most reliable option.
How often should I replace my survival gear?
Inspect all gear every 6 months for signs of wear, damage, or expiration. Replace first aid supplies (bandages, antiseptic, medications) when they pass their expiration date, water purification tablets after 3-5 years (even unopened), and any gear with frayed seams, broken buckles, or cracked plastic. High-quality gear built from durable materials can last 10+ years with proper care, while cheap, low-quality items may need replacing after 1-2 heavy uses. Rotate gear regularly to distribute wear, and never store sleeping bags or insulation layers compressed for long periods, as this breaks down their warmth-retaining loft.
Do I need expensive branded gear to be prepared for emergencies?
No. Building a reliable survival kit is about prioritizing function over brand name, and matching gear to your specific needs. You can build a high-quality core survival kit for under $200 by focusing on multi-use items and avoiding unnecessary gadgets. The most important factor in survival is familiarity with your gear: practice building a fire with your fire starter, filter water with your purifier, and set up your shelter before you ever need to use it in an emergency. Expensive gear you don’t know how to use is far less valuable than affordable, well-practiced basics.

A tailored first aid kit adjusted for your trip type and personal health needs is the most critical item for handling injuries when professional help is hours away.
Credit: www.ebay.ca
Final Thoughts
There is no one-size-fits-all "best" survival gear: the right kit for a weekend desert camping trip will look very different from a kit prepped for urban hurricane season. The most important step you can take is to build a kit that matches your skill level, typical adventure type, and local environment, then practice using every item until it feels second nature. A $20 ferro rod you’ve used to start 50 fires is far more valuable than a $200 high-tech fire starter you’ve never tested in wet, windy conditions.
Regularly inspect and update your kit every 6 months, replacing expired supplies and adding gear for new activities you’re planning. If you’re just starting to build your survival kit, start with the 3-3-3 prioritization framework to cover your most urgent needs first, and avoid the common mistake of overspending on gear you don’t need.
Stay prepared, stay safe, and always let someone know your plans before heading into the wild.


